


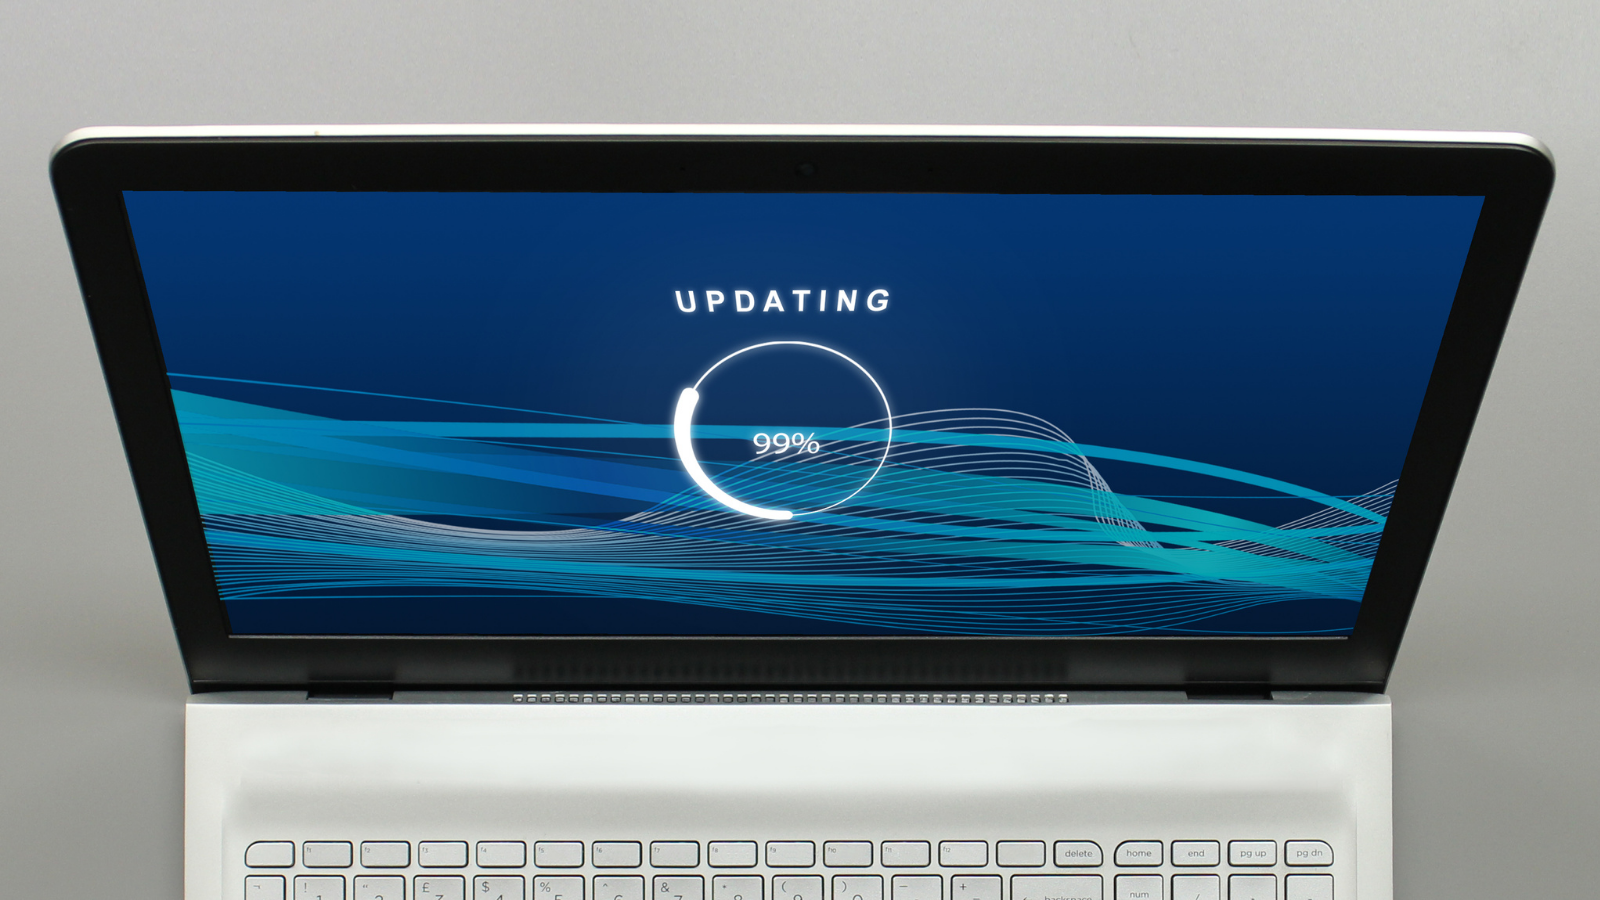
Windows 11 is the newest operating system released by Microsoft. It was released on October 5, 2021. This guide will help individuals who wish to install Windows 11 in a virtual machine. Join me as we install Microsoft Windows 11 in a container using VirtualBox.
Things you’ll need:
- Computer
- Already installed VirtualBox
Downloading Windows 11 ISO file:
- Go to Google.com
- Type in “windows 11 iso file”
- One down click “Download Windows 11”

- Scroll down and look to your left, scroll down, and you’ll see “Download Windows 11 Disk Image (ISO)”
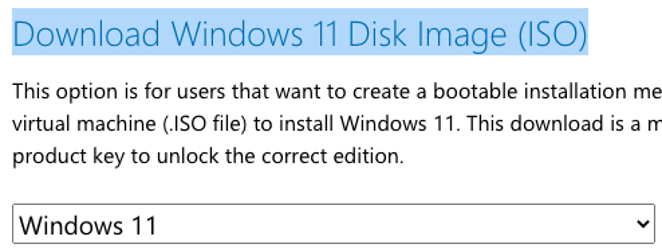
- There will be a drop-down box that says “Select Down” click that and click “Windows 11”
- Click “Download” and that usually takes a few minutes/hour depending on your Internet speed
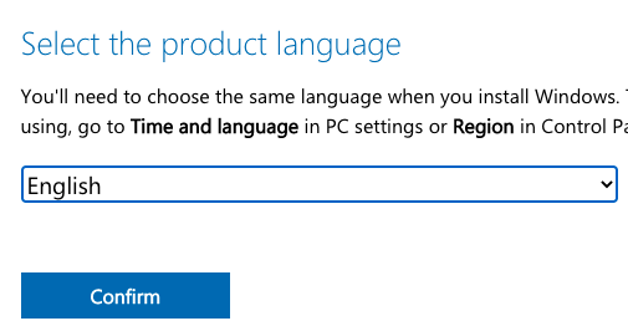
- After you’ve clicked that, another box appears and that says “Select the product language”. Click the language you use. Then “confirm”
- Another box will appear and that’ll say “Download Windows 11 English 64-bit Download”

After the Windows ISO file is downloaded, you are then going to open VirtualBox (that you’ve already downloaded). And, what will be shown is how to get Windows 11 without running into some trouble. (Will be shown with screenshots.)
Creating a VirtualBox Machine:
- Open VirtualBox
- Towards the top left, click on the button called “New”

- The “Name and operating system” will pop up.
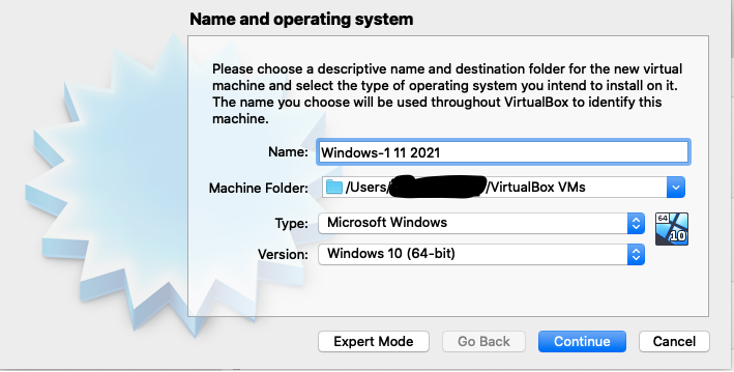
- Name (or whatever name of your choice) “Windows-1 11 2021” (wherever your Machine’s folder will be at)
- Then the Type (meaning we downloaded the Windows 11 machine) will be “Microsoft Windows”
- The version will be “Windows 10 64-bit”
- Then click “Continue”
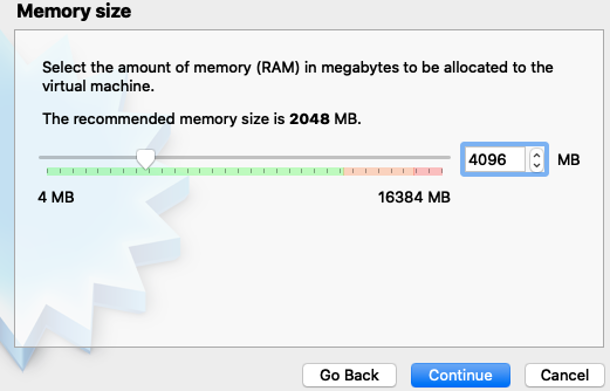
- Memory Size pops up, and we're going to be giving it “4096 MB” then click continue
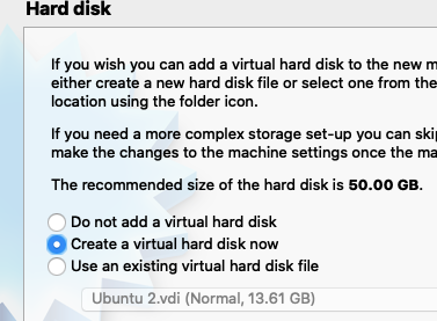
- The Hard disk pops up. Click “Create a virtual hard disk now”
- After click “Create”
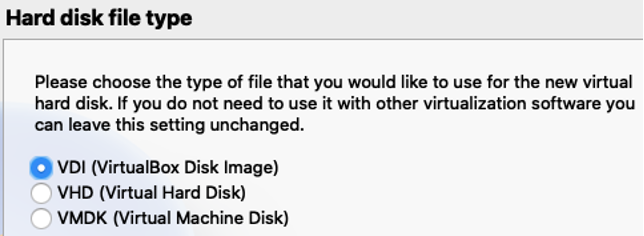
- Hard disk file type pops up, and it's the type of file that you would like to use for the new virtual hard disk. For this, we are going to be clicking on “VDI (VirtualBox Disk Image).” After that, click the button “Continue”
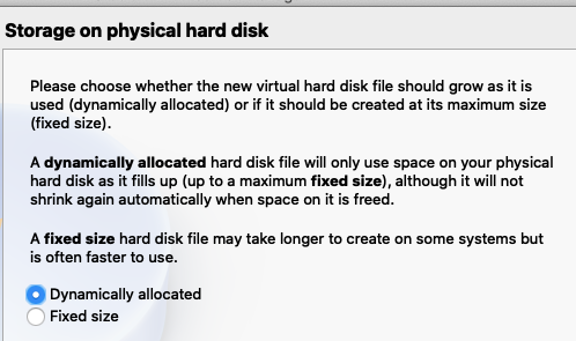
- Storage on physical hard disk – This is asking about the size of the file when it is used. We are going to be clicking on “Dynamically allocated” to the hard drive. Click the button “Continue” after that you’ve clicked that
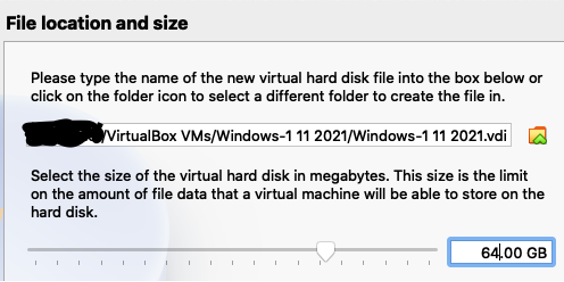
- File location and size – it is asking where you can put the new virtual hard disk file into the box, or click on the folder icon to select a different folder to create the file in
- Then, underneath that, set the virtual hard disk in megabytes to “64.00 GB” as this is the size limit, and click the “Create” button to complete the procedure
Modifying the Windows Settings: Before the Virtual machine is up and running, we have to go into the settings of the machine and set a few things that I will be showing in the following steps:
- Make sure you are on the “Windows-1 11 2021” box and click the yellow “Settings”

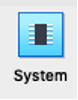
- Click “System” and go to the “Processor”

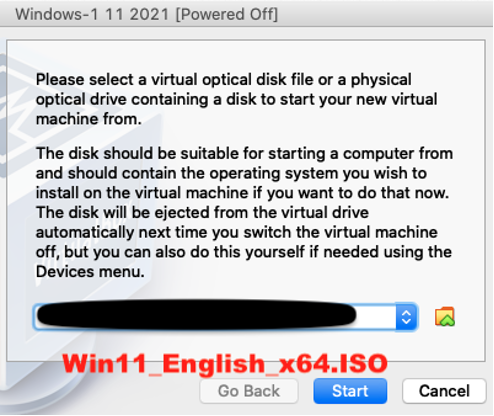
- After, click the “Storage” and click the “Empty” looking disk look like, and you are then going to go to the “Win11_English_x64.iso”


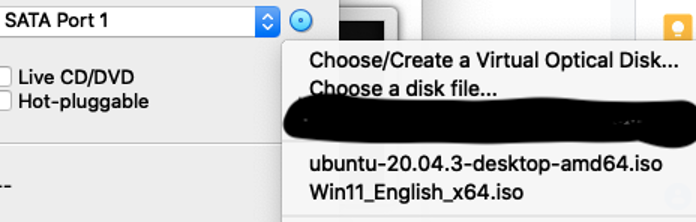
- Then click “OK”
Time to power it up, but there’s an error:
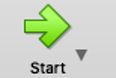
- First, make sure you are on the “Windows-1 11 2021” then click the “Start” button that is green
- Powered up you’ll see a screen asking about selecting a virtual optic disk, click the box and click the “Win11_English_x64.iso” if you didn’t get that then you are fine
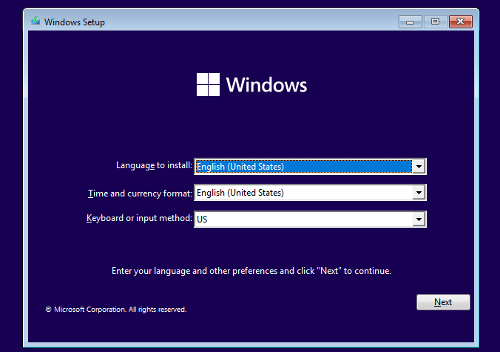
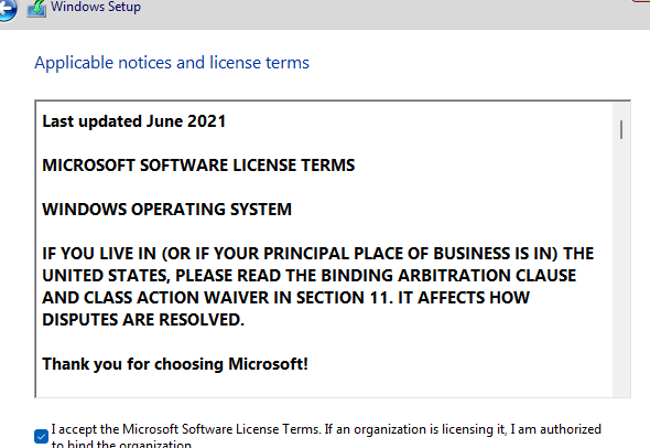
- After, you’ll see a window setup screen. Set your “Time and Currency format” and “Keyboard or Input method” that’ll suit you. Then click “Next”
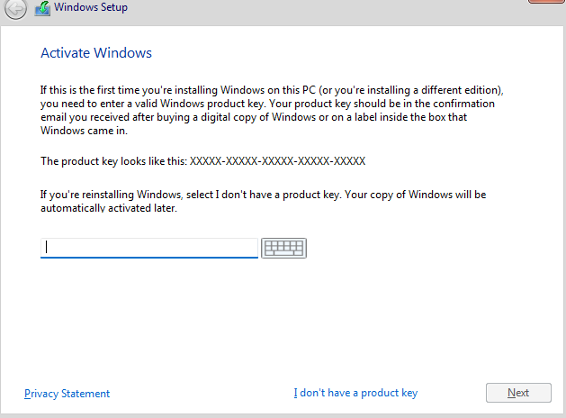
- Click the “Install Now” button
- After, click “I don’t have a product key.” Then click the “Windows 11 pro” then click “Next”

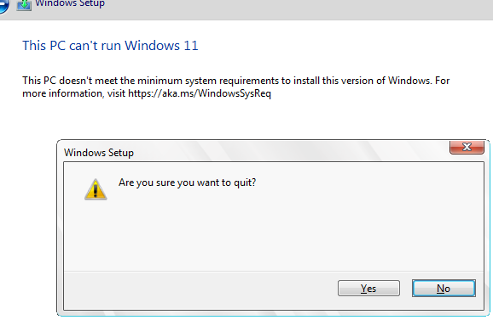
- Within installing windows 11 on VirtualBox, you’ll run into an error where it’ll say “This PC can’t run Windows 11” don’t worry about that and click the “X” at the top of the screen then “Yes” to quitting the screen


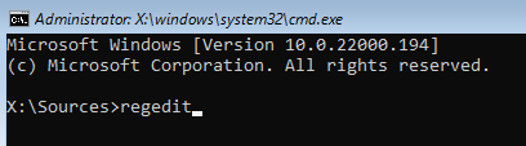
- When that is done, click the “Shift F10” on your keyboard and this will bring up the command line
- In the command line, type the command “regedit” all lower case. Which will then open up a screen called “Registry Editor”
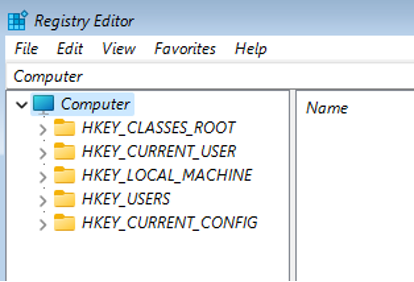
- Then double-click a file called the “HKEY_LOCAL_MACHINE” and after that double click a file called “SYSTEM”
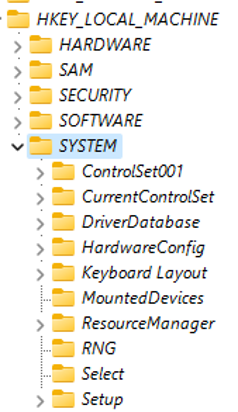
- And double-click a file called “Setup” right-click that folder and click “New” then near it “Key.”
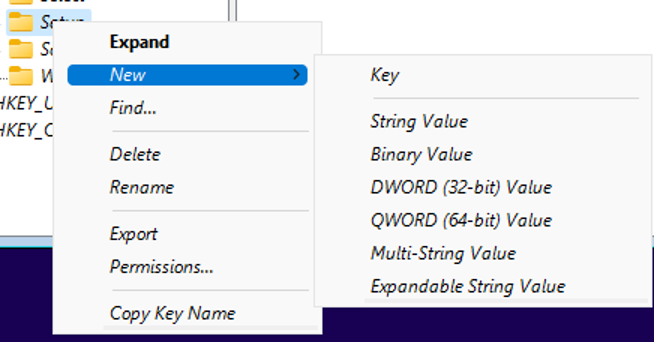
- This new key will then create a folder, and we're going to name it “LabConfig” and it has to be named that.

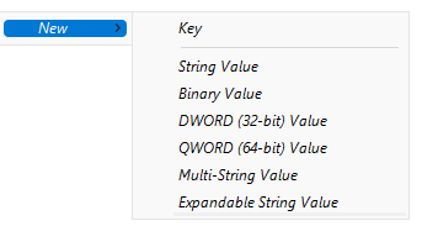
- In the new folder “LabConfig” we're going to right-click in the folder and click “DWORD (32-bit) Value”
- Name this key-value “BypassSecureBootCheck” and then double enter where a screen called “Edit DWORD (32-bit) Value” will come up. And in the same screen, there is something called “Value data” you are going to enter 7 zeros “00000001” then hit enter on the keyboard

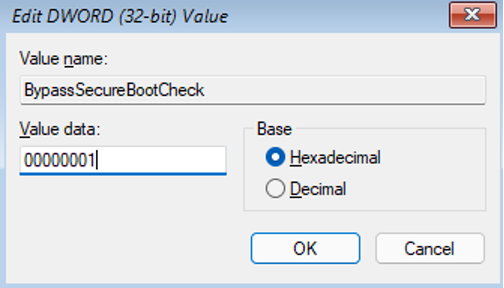
- It should look like this.

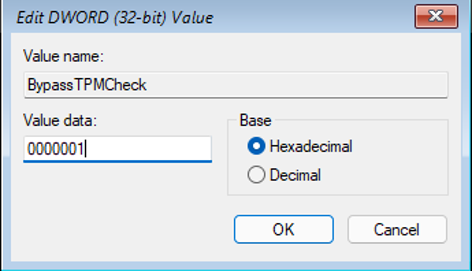
- We are then going to create another DWORD (32-bit) Value, and name it “BypassTPMCheck” and double enter again and type in “00000001” (MAKE SURE YOU ARE COUNTING)
- Now, close that window and the command line window and go through with installing Windows 11 on either mac or windows computers using VirtualBox. You also shouldn’t get any errors as well after
IMPORTANT: Finally, if something is wrong, exit the system and go into the settings of “Windows-1 11 2021” and make sure the base memory is set to “4096,” as it appears it resets itself to the default base memory. Following that, you should see this screen.


Comment